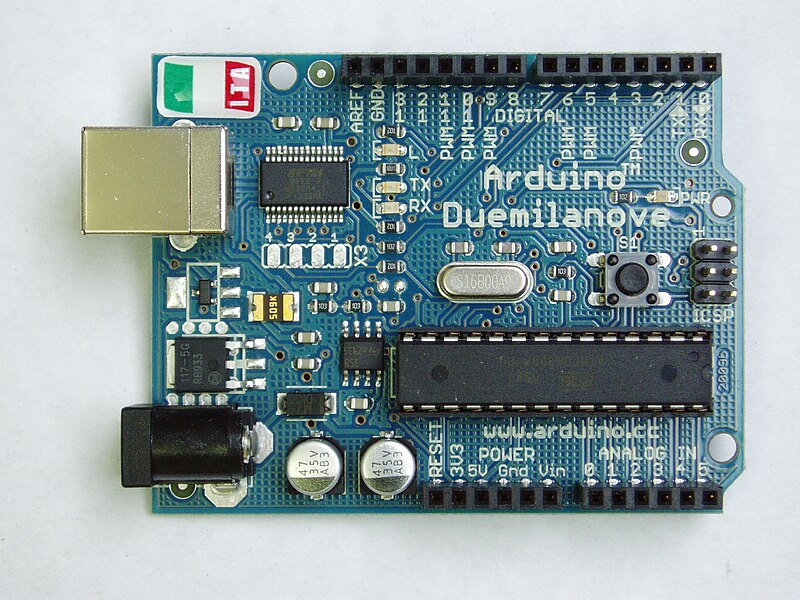
An Arduino robot is a programmable machine that can interact with its environment through sensors, motors, and other hardware components. Utilizing Arduino boards as its brain, the robot can be customized to carry out a wide array of tasks. Arduino, being an open-source electronics platform, offers both the hardware in the form of microcontroller boards and the software, an Integrated Development Environment (IDE), to program the robot. The versatility of Arduino makes it an instrumental tool in the realm of robotics, allowing hobbyists, educators, and professionals to bring their robotic projects to life with relative ease.
The function of an Arduino robot can vary significantly based on its design and the objectives it’s programmed to accomplish. At its core, the robot may use motors to navigate spaces, or it could have an array of sensors to collect data. These sensors can include infrared (IR) modules to detect obstacles, allowing the robot to navigate autonomously within an environment. The decision on how to react to sensory input is determined by the logic coded into the Arduino by its user, via the official Arduino IDE. This malleable nature allows for endless possibilities, from simple line-following robots to complex, interactive autonomous systems that perform intricate tasks.
Arduino’s accessibility has made it an essential component in educational robotics as well. It simplifies the introduction to the concepts of electronic circuits and programming, whilst providing a hands-on experience. In a classroom setting, students can see the immediate effects of their code on the physical robot, enhancing their understanding of cause and effect in a tangible and interactive manner. This has cemented Arduino’s place as a cornerstone in STEM education, as well as a favored platform for hobbyists and tinkerers experimenting with robotics projects.
Understanding Arduino Robots
Arduino robots are versatile platforms that allow enthusiasts to delve into the world of robotics by combining software and hardware components. They are particularly well-suited for education and hobbyist projects, offering a practical approach to learning about robotics and electronics.
Components and Architecture
An Arduino robot is typically comprised of a Motor Board and a Control Board. The Motor Board is responsible for driving the motors, while the Control Board handles sensor processing and decision-making. The architecture of an Arduino robot is modular, allowing for customization and expansion. Key components include:
- Microcontrollers: At the heart of each board, a microcontroller runs the software written by the user.
- Sensors: To interact with its surroundings, a robot uses a range of sensors such as ultrasonic, infrared, or touch sensors.
- Actuators: Motors and servos are common actuators in Arduino robots, facilitating movement.
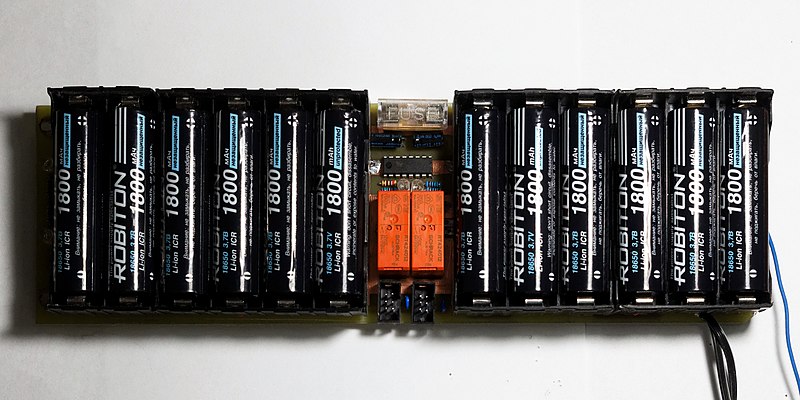
- Power Supply: A battery or external power source is essential for the robot’s operation.
- Input/Output Pins: These pins on the Arduino boards allow for additional sensors and actuators to be connected.
Types of Arduino Robots
There are various types of robots that can be built using Arduino platforms. Some of the common Arduino robot types include:
- Obstacle Avoidance Robots: These robots use sensors to detect and navigate around obstacles.
- Line Following Robots: Equipped with sensors to detect and follow a predetermined path.
- Teleoperated Robots: Controlled remotely, these robots can perform a variety of tasks at a distance.
- Autonomous Robots: These robots are capable of processing sensor data and making decisions without human intervention.
Getting Started with Arduino Robotics
Entering the world of Arduino robotics requires understanding the fundamental tools and materials needed, along with grasping the basics of setup and wiring. This equips enthusiasts and beginners alike to kickstart their journey into building and programming their own robots.
Essential Tools and Materials
To get started with Arduino robotics, one needs a collection of essential tools and materials. The core of any Arduino robot is the Arduino board, a versatile microcontroller ideal for building a variety of robots. Key materials include:
- Motors: To facilitate movement.
- Breadboard: For prototyping without soldering.
- Wires: Connecting components.
- Motor driver: To control the power supplied to motors.
- Battery holder and batteries: Typically 4 AA batteries for power supply.
- Sensors: For interaction with the environment.
A brief yet crucial list includes:
- Screwdrivers: For assembly.
- Wire strippers, cutters: For cable management.
- Soldering iron: If permanent connections are desired.
- Multimeter: For troubleshooting electrical connections.
Basic Setup and Wiring
The initial setup for an Arduino robot involves the configuration of the microcontroller through the setup() function in the Arduino IDE. This includes defining pin modes and initiating libraries.
Wiring is a critical part of assembly that involves connecting sensors and actuators to the Arduino board. Beginners often employ a breadboard to establish temporary circuits without soldering. The process follows:
- Place the Arduino board and motor driver on the breadboard securely.
- Use jump wires to connect the Arduino’s digital and analog pins to the motor driver.
- Connect motors to the driver, paying close attention to polarity.
- Power the system with batteries, ensuring that the correct voltage is supplied.
Wiring must be done with precision to ensure that signals are correctly relayed between the Arduino and peripheral components, making the robot responsive and functional.
Programming the Arduino Robot
Programming the Arduino Robot involves using the Arduino IDE to write and upload code that controls the robot’s actions. The Arduino IDE provides a standard structure for writing code which gets executed through the loop() and setup() functions.
Arduino IDE and Code Structure
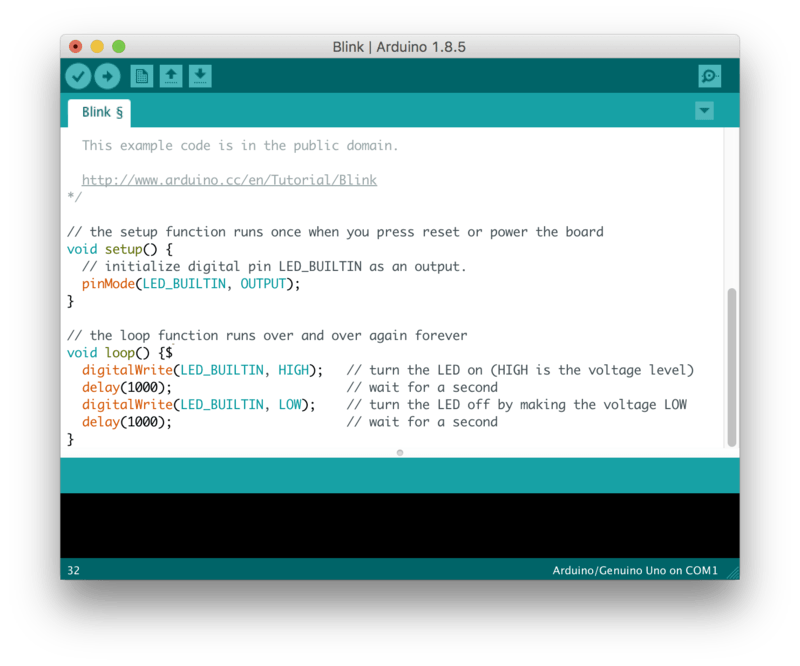
The Arduino Integrated Development Environment (IDE) is the primary software used to program Arduino boards. It offers a straightforward interface for writing, editing, and uploading code. The code structure within the IDE consists of two essential functions: setup() which is executed once at the beginning and loop() which runs continuously, and any additional user-defined functions and libraries included as needed.
Understanding the loop() and setup() Functions
In the context of Arduino code, the setup() function is used to initialize variables, pin modes, start using libraries, and set the serial communication. The loop() function contains the code that the Arduino Robot continually executes, such as reading sensors and controlling motors. The loop() function is essential as it determines the robot’s behavior in response to sensor inputs and internal logic.
Writing and Uploading Code
One writes code in the Arduino IDE using C/C++ language and structures it with functions, conditionals, loops, and variables to create the robot’s program. After writing the code, it must be compiled and uploaded to the Arduino Robot’s microcontroller. Uploading is done through a USB connection, and the board selection and port must be accurate in the IDE.
Debugging with Serial Monitor
The Serial Monitor is a built-in feature of the Arduino IDE that allows developers to receive data from the Arduino or send data to it for debugging purposes. It’s crucial for troubleshooting issues with programming, sensor readings, or motor control. Clear and informative debug messages coded into the Arduino program can significantly simplify identifying and resolving issues.
Robot Locomotion and Movement
In designing an Arduino robot, one must carefully consider the types of motors used and how they are controlled to facilitate movement. This encompasses choice and control of motors, wheel motions, and articulate movements using servos.
Motor Types and Selection
Selecting the right type of motor is vital for the robot’s locomotion. DC motors are commonly employed for their simplicity and control. They are responsible for converting direct current electrical power into mechanical motion. When coupled with a motor shield or drivers, these motors can be controlled for speed and direction. The selection process usually involves considering the robot’s weight, required speed, and the torque needed to move.
Controlling Wheel Movements
To control wheel movements, motor drivers play a crucial role. They act as an interface between the motors and the Arduino, allowing for precise control over the wheels. Arduino robots often use motor drivers in conjunction with H-bridges, integrated into the motor shield, which allows for direction change. Precise movement and avoidance of obstacles require calibration of the wheel mechanisms and responsive software that can adapt to the sensory inputs.
Using Servos for Articulation
Servos are specialized motors that enable precise control of angular or linear position, velocity, and acceleration. They are essential for the articulation of parts of a robot, such as a spider robot’s legs. In an Arduino-based system, servos are controlled using the Arduino IDE and are crucial for tasks that need more complex movements than wheels can provide, such as gripping or walking. Through the use of servo angles and programming, robots can achieve intricate maneuvers such as backward movement or rightward shifts.
Powering Your Arduino Robot
Ensuring an Arduino Robot has an adequate power supply is crucial for its operation, whether it’s for movement, processing, or performing tasks. Correct power management ensures the robot functions efficiently and safely.
Battery Basics
An Arduino Robot typically relies on batteries as a portable power source. It can operate on 4 AA batteries, usually rechargeable NiMh cells, due to their capability to provide a steady output required for the robot’s operation. Users should strictly use rechargeable batteries and avoid non-rechargeable ones to prevent damage to the robot. Batteries are responsible for delivering a voltage, often +5V, to the robot’s system, which is necessary for powering sensors, motors, and the microcontroller.
- Recommended Battery Type: Rechargeable NiMh AA batteries
- Number of Batteries: 4
- Voltage: Typically +5V
- Important Note: Non-rechargeable batteries should not be used.
Power Management and Distribution
The Arduino Robot includes an automatic selection system to choose between USB and battery power, prioritizing safety and efficiency in power distribution. When connected to USB, the motors are disabled to ensure that programming and testing are done safely. For operation without connection to a computer, the robot runs on battery power, activating all functions including motor operations.
- Power Sources: USB connection or 4 AA batteries
- Automatic Selection: Yes
- Motor Power Safety: Motors disabled on USB power
- Connections to Note: Power switch, 10-pin communication cable
Tables noted in the search results suggest the presence of multiple LEDs (such as LED1 to LED5), indicating power status and distribution across different parts of the robot. Additionally, connections such as the GND (ground) are essential for completing the circuit and ensuring the safe operation of electronic components.
Sensors and Input
In the realm of robotics, particularly with Arduino-based systems, sensors play a crucial role in enabling robots to interact with their environment. They serve as the input channels through which a robot perceives its surroundings, whether it’s to navigate obstacles, recognize patterns, or measure environmental conditions. Below, we explore common sensors used, methods of reading from these sensors, and how to integrate and calibrate them for optimal performance in robotic applications.
Common Sensors Used in Robotics
- Infrared Sensors: Detect proximity and measure distance based on infrared light reflection.
- Ultrasonic Sensors: Utilize sound waves to measure distance to an object, similar to sonar.
- Temperature Sensors: Monitor changes in temperature within an environment.
- Pressure Sensors: Detect force exerted against a surface.
- Light Sensors: Measure intensity of ambient light.
These sensors often output data either as an analog signal which fluctuates continuously in voltage, or as a digital signal which switches between low (0V) and high (usually 5V) values.
Reading from Sensors
- Analog Sensors: The Arduino board reads an analog sensor’s data through an Analog-to-Digital Converter (ADC). The ADC maps the voltage level to an integer between 0 and 1023, corresponding to the
0Vto5Vrange. - Digital Sensors: Output from digital sensors is read from digital pins on the Arduino, indicating a digital HIGH or LOW state, providing a binary view (object detected or not detected, for instance).
Care must be taken to ensure that the sensor’s output (analog or digital) is compatible with the Arduino’s input pins and that the pin mode (INPUT or OUTPUT) is appropriately set in the code.
Sensor Integration and Calibration
To achieve reliable sensor performance in an Arduino robot:
- Integration: The sensors must be properly connected to the analog or digital pins on the Arduino. Libraries specific to the robot, like the Robot library for the Arduino Robot, often include predefined functions to simplify sensor integration.
- Calibration: Sensors sometimes require calibration to accurately interpret the input signals. Calibration involves comparing sensor readings under known conditions to the actual values and adjusting the readings accordingly.
It is essential to follow datasheets and manuals for each sensor to understand the necessary calibration procedures to ensure precise sensor inputs for the Arduino robot’s decision-making processes.
Robot Control Mechanisms
Arduino robots can be controlled through various means, heavily reliant on the user’s application and the specific design of the robot. These control mechanisms range from direct manual control to more complex autonomous systems that can perceive and react to their environment.
Manual Control with a Remote
Robots often start with the basics: manual control. A remote control, functioning as an external input device, sends signals to the robot, which are received and interpreted to perform the desired actions. The remote control might use infrared (IR), radio frequency (RF), or even Bluetooth for communication. This method gives the operator direct command over the robot’s movements.
Autonomous Control Systems
Autonomous control, in contrast, embodies the essence of robotics. An Arduino robot with autonomous capabilities can make decisions based on sensor data. For instance, it might use photosensors to navigate through a space, avoiding obstacles without human intervention. Control boards, like those specific to Arduino, facilitate the processing of this sensor data, enabling the robot to execute programmed commands based on real-time inputs.
Integrating Bluetooth and Smartphone Control
Advanced control includes the integration of Bluetooth and smartphone applications. By using a dedicated Android application, users can communicate with their Arduino robot via their smartphone. This not only makes the robot more accessible but also opens up a variety of complex control options. Bluetooth serves as the bridge between the smartphone app and the robot, where command signals sent from the smartphone’s app are received by the Bluetooth module on the robot.
These mechanisms provide a spectrum of control options for Arduino-based robots, from simple directional commands to complex, sensor-driven behaviors, ensuring versatility for hobbyists and educators alike.
Interfacing and Communication
Interfacing and communication are central to the function of the Arduino robot, enabling it to receive commands and interact with other devices. Whether through wired or wireless means, establishing a robust communication channel is vital for controlling the robot’s actions and retrieving sensor data.
Wired vs Wireless Communication
Wired communication is typically established via a serial port or USB port connecting the Arduino robot to a computer or another device. This form of communication offers a reliable and secure connection, essential for real-time control and programming.
- Wired: Uses physical connections like USB cables.
- Wireless: Relies on radio frequencies or infrared signals.
Wireless communication offers greater flexibility by removing the physical tether. It allows the Arduino robot to be controlled remotely, which is especially useful in scenarios where the robot needs to move freely without restraint.
Utilizing Serial Communication
Serial communication is a universal communication protocol that the Arduino robot uses for transmitting and receiving data. It sends data one bit at a time, over a single channel, which makes it simple and effective for interfacing with various sensors and other devices.
- Data flows in a sequence over serial communication.
- Variety of baud rates dictate speed of transmission.
Bluetooth Module Integration
Integrating a Bluetooth module with an Arduino robot enables wireless communication over short distances. This allows the robot to be controlled via smartphones, tablets, or Bluetooth-enabled computers.
- Bluetooth modules like HC-05/HC-06 can be used.
- Secure, wireless communication up to 100 meters (328 feet).
By incorporating Bluetooth technology, the robot gains the ability to interact in a wireless setting while ensuring a stable and responsive connection suitable for a variety of applications.
Building the Robot Structure
The structure of an Arduino robot forms its physical foundation, impacting its stability and ability to move. It’s essential to consider the robot’s intended use when designing its structure and selecting materials.
Design Considerations
When designing the robot’s structure, builders should account for the load the robot will carry, the terrain it will navigate, and any external factors like the presence of water or dust. The materials chosen for the structure typically range from acrylic and plywood for simple, low-cost robots to metals like aluminum for more durable and heavy-duty robots. 3D printing has become a popular method for creating custom parts with complex shapes and precise fittings, especially for joints and mounts.
Assembling the Chassis and Frame
Assembling the robot’s chassis and frame is the first step in robot assembly. The chassis serves as the robot’s skeleton, onto which all other components are mounted. Common materials include:
- Acrylic
- Plywood
- Aluminum
The chassis should offer mounting points for all components, including motors, sensors, and the control board. While assembling the frame, ensuring right angles and tight joints will enhance the robot’s overall stability.
Attaching Motors and Wheels
Motors are integral to the Arduino robot’s movement. They must be securely attached to the chassis while allowing for proper alignment with the wheels. The following steps outline the attachment process:
- Attach motor brackets to the chassis using screws.
- Secure the motors to the brackets.
- Align wheels with the motors’ output shafts before affixing them.
In addition to the primary wheels, a caster wheel may be installed to provide additional support and balance for the robot, especially if the design is three-wheeled with two driving wheels. The caster wheel, typically placed at the front or rear, swivels to allow for smooth directional changes.
Advanced Topics in Arduino Robotics
In Arduino robotics, pursuing advanced topics enables enthusiasts to enhance the capabilities of their robots. These include developing sophisticated obstacle avoidance algorithms, creating multifunctional robot arms, and implementing precise PID control systems for improved stability and performance.
Developing Obstacle Avoidance Algorithms
Obstacle avoidance is critical for autonomous robots. An advanced obstacle-avoiding robot integrates sensors and algorithms to navigate environments. Ultrasonic sensors are often employed; they measure distances using sound waves. The information from these sensors feeds into algorithms that help the robot decide when to alter its path to avoid collisions.
- Sensor Integration: Utilize multiple sensors to obtain comprehensive environmental data.
- Algorithm Optimization: Refine algorithms such as the bug algorithm or A* pathfinding for efficient navigation.
Creating a Robot Arm
Developing a robot arm involves mechanical design and control systems. An effective robot arm requires precision and the ability to perform complex movements.
- Servo Motors: Deploy servo motors for precise control of the arm’s movement.
- Kinematics: Implement inverse kinematics for accurate arm positioning.
The Arduino platform processes inputs from various sensors on the arm to calculate the movements needed to achieve a desired task, like manipulating objects or articulating tools.
Exploring PID Control
PID (Proportional-Integral-Derivative) control is an advanced control mechanism that enables robots to execute actions with precision. Using real-time feedback, a PID controller adjusts a robot’s motors and actuators to reach and maintain a set target state.
- Proportional Component: Determines the reaction to the current error.
- Integral Component: Accounts for past errors and integrates them over time to eliminate residual errors.
- Derivative Component: Predicts future errors based on the current rate of change.
By mastering PID control, one can significantly enhance a robot’s stability and responsiveness in real-world operating conditions.
Troubleshooting and Maintenance
Effective troubleshooting and maintenance of an Arduino robot ensure its reliability and performance. This section will guide users through identifying and resolving common issues they may encounter, as well as advise them on routine checks and updates that are essential for long-term functionality.
Common Issues and Solutions
- Erratic Servo Movement:
- Symptom: Servos do not move smoothly or behave unpredictably.
- Solution: Check ground connections. Ensure that if servos are powered by a different source than the Arduino, they share the same ground.
- Reversed Movements:
- Symptom: The robot performs tasks but in the opposite order of commands given.
- Solution: Reset the Arduino board to ensure proper sequence execution.
- Power Issues:
- Symptom: The robot does not power on or frequently disconnects from the power source.
- Solution: Verify the USB connection or battery level. Ensure the robot automatically selects the power source between USB and battery. For battery issues, check if 4 rechargeable NiMH AA batteries are properly installed and charged.
- Driver Communication:
- Symptom: The board is not recognized by the computer software.
- Solution: Install the correct drivers to facilitate communication through the virtual serial port provided by the Arduino board.
Routine Checks and Updates
- Firmware Updates:
- Regularly check for and install firmware updates from the Arduino website to keep the board’s software running smoothly.
- Hardware Inspection:
- Perform visual inspections for loose connections and damaged components that might affect performance.
- Software Calibration:
- Ensure software parameters for sensors and actuators are correctly calibrated to avoid misinterpretation of inputs or erroneous outputs.
- Backup Configurations:
- Always keep backups of working configurations and code to prevent loss during updates or repairs.
Frequently Asked Questions
In addressing common queries, this section taps into the practical aspects of utilizing and constructing Arduino-based robots, offering insights into programming, project initiation, essential components, benefits, applications in robotics, and learning materials.
How do you program an Arduino robot?
One programs an Arduino robot using the Arduino Integrated Development Environment (IDE), where one writes code in C or C++ and uploads it to the Arduino microcontroller. This process involves writing scripts to control the robot’s sensors, motors, and other peripherals.
What are some beginner-friendly Arduino robot projects?
Beginner-friendly Arduino robot projects include obstacle-avoiding robots and line-following robots. These projects introduce basic concepts of reading sensors and motor control, and they often come with comprehensive guides and example code.
What components are necessary for building an Arduino robot?
Essential components for building an Arduino robot include a microcontroller (like the Arduino board), motors for movement, sensors for environmental interaction, a power supply, and a chassis to mount all of the hardware.
What are the advantages of using Arduino in robotics?
Using Arduino in robotics offers several advantages, including an open-source environment, ease of use for beginners, a large community for support, and affordability. It provides the flexibility to create various robotic functionalities from simple to complex systems.
In what ways can Arduino be implemented in a robotic car project?
Arduino can be implemented in a robotic car project to manage tasks like motor control, sensor data processing, and decision-making. With Arduino, one can create autonomous cars that navigate obstacles, follow specific tracks, or even incorporate AI elements for advanced behaviors.
What educational resources are available for learning Arduino robotics?
Educational resources for learning Arduino robotics include online tutorials, forums like the Arduino Forum, open-source project repositories, books, and interactive kits like the Elegoo Smart Robot Car kit, which offers hands-on experience in building and programming robots.
