Making a Water Rocket Launcher at Home
Have you ever dreamed about sending a rocket sky-high? If yes, this is your lucky day because we are here to show you that you can make a rocket fly without messing with dangerous explosives. All you need to have is a bottle, PVC pipes, water, and a bicycle pump. If you still do not believe us, then just read along because we are going to give you a step-by-step tutorial on how to make your own water rocket launcher at home.
Disclaimer: This project should be done with the utmost care and with the help of adults.
What You Need
- Two Soda Bottles
- Hose Clamp
- Zip Ties
- Hose
- String
- 98 inches - ½ inch big PVC pipes
- ½ inch PVC tee
- Duct tape
- Bicycle pump
- Water
- Tire replacement valve
- String
- Drill
- Hacksaw
- Drill bit
- Scissors
- Pliers
How Does a Water Rocket Launcher Works?
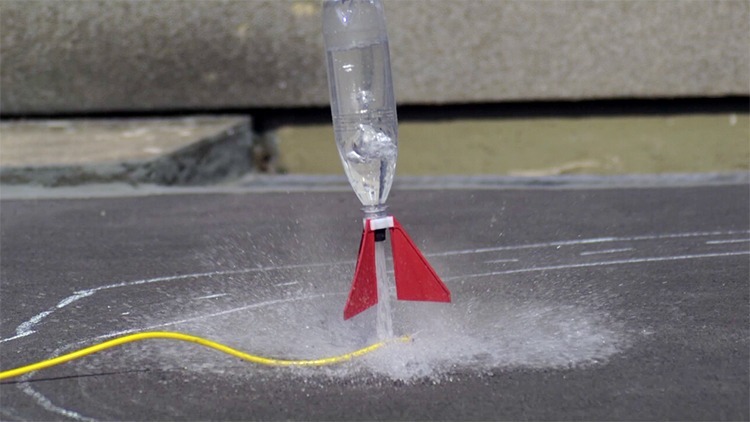
This rocket is powered by the sudden release of pressurized air, which is why it is essential for you to tightly seal the parts together so it can hold the pressure until your rocket is ready to launch. This type of water rocket launcher has a simple string trigger that unlocks the pipe from the end of the bottle then releases the pressure that sends the bottle up into the sky.
Making Your Water Rocket Launcher
Step 1 – Using a hacksaw and with the help of an adult, cut three different lengths of ½ inch PVC pipes: 18 inches, 2 inches, and 78 inches.
Step 2 – Still, with an adult's help, drill a hole for the valve using a ½ inch drill bit. The hole is located at the top of one of the PVC end caps. If you’re doing this step by yourself, make sure that you hold the cap steady using pliers.
Step 3 – Remove the cap of the tire valve and set it aside. Put the valve through the hole you made in the PVC end cap and make sure it sticks out the top. Put the tire valve cap back on and grab the valve’s end using a plier until it’s firmly seated in the PVC's end cap.
Step 4 – Connect the launcher parts by lining up the pipe sections and connectors in the order that they will be assembled: The solid end cap, 18-inch piece, the tee, 78-inch piece, and the 20-inch piece that is connected to the leg of the tee.
Use a PVC pipe cleaner to clean the outside of the pipe and the inside of the fitting. After this, glue together the connections one-by-one using PVC pipe cement. Make sure that you hold the parts together for a few seconds and let the cement set.
Step 5 – Seal the bottle by marking the pipe assembly 11 inches from the long open end. In order to do this, you need to use a flame from a candle and heat the PVC pipe at the 11 inches mark until it becomes soft. After this, you need to push the pipe inward in order to make a slight bulge. Hold the pipe until it cools and the bulge is no longer bendable. This bulge will make a seal between the soda bottle and the pipe.
Step 6 – Create a clamp for the bottle by using duct tape to tape the cable ties together. Make sure that the cable ties are parallel and they all face the same direction. After this, put the soda bottle over the end of the pipe and ensure it’s seated against the bulge. You have to wrap the cable ties around the pipe with the head of the ties facing inward, and this will catch the lip of the bottle and holding it tightly to the bulge. Secure the ties by tightening the hose clamp around the duct tape.
Step 7 – Create a launch trigger by cutting the top and bottom of the other soda bottle. Flatten the remaining section of the bottle and cut a one ¼ inch hole through both sides without creasing the bottle. This part will act like a spring that will hold the trigger in position until the rocket is ready to launch.
After this, you need to drill a small hole in the side of a short scrap 1 ½ inch PVC pope. Then you need to thread the end of the 4-foot piece of string through the hole and tie the end into a not to keep it from coming out. This pipe will act as the trigger of the rocket launcher.
After this, you need to remove the bottle from the end of the pipe, slide the plastic spring onto the pipe, then over the cable ties, and up against the pipe clamp. Once you’ve done it, you need to slide the 1 ½ inch PVC scrap over the cable ties and pope. Put the string through the plastic spring holes and tape the other end of the string to the pipe using duct tape.
You can make sure that your trigger is working by pulling on the string. The PVC trigger should drop, and the cable ties should open up. Once you let go of the string, the spring should push the trigger over the cable tie ends.
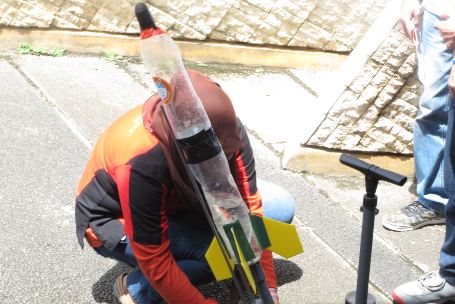
Step 8 – Prepare for launch by filling up the 2-liter soda bottle with about one-third water, then slide the bottle onto the end of the pipe. After this, you need to pull the string on the trigger down so that the bottle will be placed against the bulge and the cable ties will catch the bottle’s lip. Then, release the string so that the trigger will slide back over the cable ties to lock the bottle in place.
Step 9 – Add pressure to the launcher by attaching a bicycle pump to the valve that is coming out of the tee. Make sure that you pump no more than 70 psi into your water rocket launcher.
Step 10 – Launch your rocket by pulling the string. Make sure that your rocket is pointed straight up and there’s adult supervision to avoid any accidents from happening.