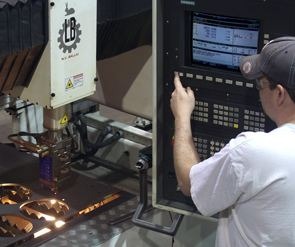
Laser cutting machines are designed and engineered to fabricate designs with speed and precision at a low cost. These machines use a flat material sheet of metal, glass, and other materials to create unique projects.
Back in the day, users were not able to create 3D objects with their designs. However, things have changed for the better today. A range of software and equipment have been introduced to turn dreams into reality.
At the same time, there are some specific design guidelines that users should follow to meet the quality and precision requirements. Therefore, let’s look at some of the top tips to design for laser cutting.
What File Formats Do You Need?
The file format is the first thing you need to consider when it comes to discussing tips to design for laser cutting. Designing your laser cutting project involves preparing a vector file. A vector file is basically a mathematical formula that resizes the design without compromising the quality.
With that said, if the image is jpg or png, it will lose its quality upon resizing since it is based on pixels. This is why vector files are the most preferred choice in the world of laser-cutting designs. The laser cutting machines are designed such that they will read the vector files and engrave or cut accordingly.
However, the same machines are not able to read jpg or png files.
Which Software Should You Choose?
The next important tip is related to which software or program to use. Before we go into the details, you should opt for the best design program for laser cutting available. Similarly, you should also choose the best design software for laser cutting out there. The reason is that once the materials have been cut and the design is not according to your preference or needs, you will simply be wasting money.
Therefore, the only way to ensure that the laser cutting machine does exactly what you want it to do is by using the best 2D or 3D software. If you are a beginner, you should try your hands at 2D software first. Once you develop a firm grip on the basics, you should move to 3D software.
In addition to that, 2D software is mainly used by graphic designers to produce banners or logos. On the other hand, 3D software is typically used by engineering and mechanical projects. Working with 3D software allows you to include extremely fine details that are bound to make your projects stand out.
Pick the Right Material
Picking the right material is perhaps the most important if you are working on a laser-cutting design for home projects. This is because some materials can catch fire instead of being cut or engraved. The laser beam can reach an extremely high temperature that can lead to serious injuries.
Before you begin working with a specific material, go through its safety and toxicity standards. You wouldn’t want to work with an extremely toxic material that can cause chronic and respiratory problems amongst you and your family members. Only professionals who know their way around materials such as wood and metal etc. are able to work for hours without risking their safety.
However, since amateurs or beginners are not aware of picking the right material, they often pose a serious threat not only to themselves but also to their co-workers.
Choose Appropriate Material Thickness
While picking the right material is one thing, choosing the appropriate thickness is another. It entirely depends on how detailed your design is along with the level of engraving. If your design involves engraving, you wouldn’t want to pick a thin material.
Similarly, if the design does not require intensive engraving, then there is no point in picking the thickest material available. If the project requires some flexibility, you should adjust your design to thin material.
Remember the Kerf
The kerf plays an important role pertaining to tips to design laser cutting designs. In simple words, it is a small amount of material that evaporates when a material is cut creating a gap. It is not only limited to laser cutting machines but also other types for instance blade cutting wood due to the blade featuring a thickness.
At the same time, the laser also has a thickness, which eventually leaves a kerf. Therefore, the kerf is crucial especially when you design assemblies. If your design requires one piece fitting in another, you need to add half of the kerf to the inner object and subtract the other half from the outer object.
Minimum Distance Between Cutting Lines
Finally, when it comes to laser cutting design, the distance between two cutting lines needs sufficient consideration as well. If the two lines happen to be too close, the laser beam can cause a fire. The minimum distance depends on the thickness of the material.
In addition to that, having two lines too close to each other will put immense stress on a thin detail. Although the laser will do a fine job but the material might break. Therefore, it is important that you value the distance based on the type of material used.
Final Word
Following the above-mentioned laser cutting design tips will help you improve the production process. Beginners and professionals irrespective of the project they are working on should follow these guidelines. This is the only way to ensure that you come up with highly precise, reliable, and accurate projects each time. It might not be easy at the start but will prove beneficial down the road.
