Ideas for Adding Parachutes to Your Water Rocket
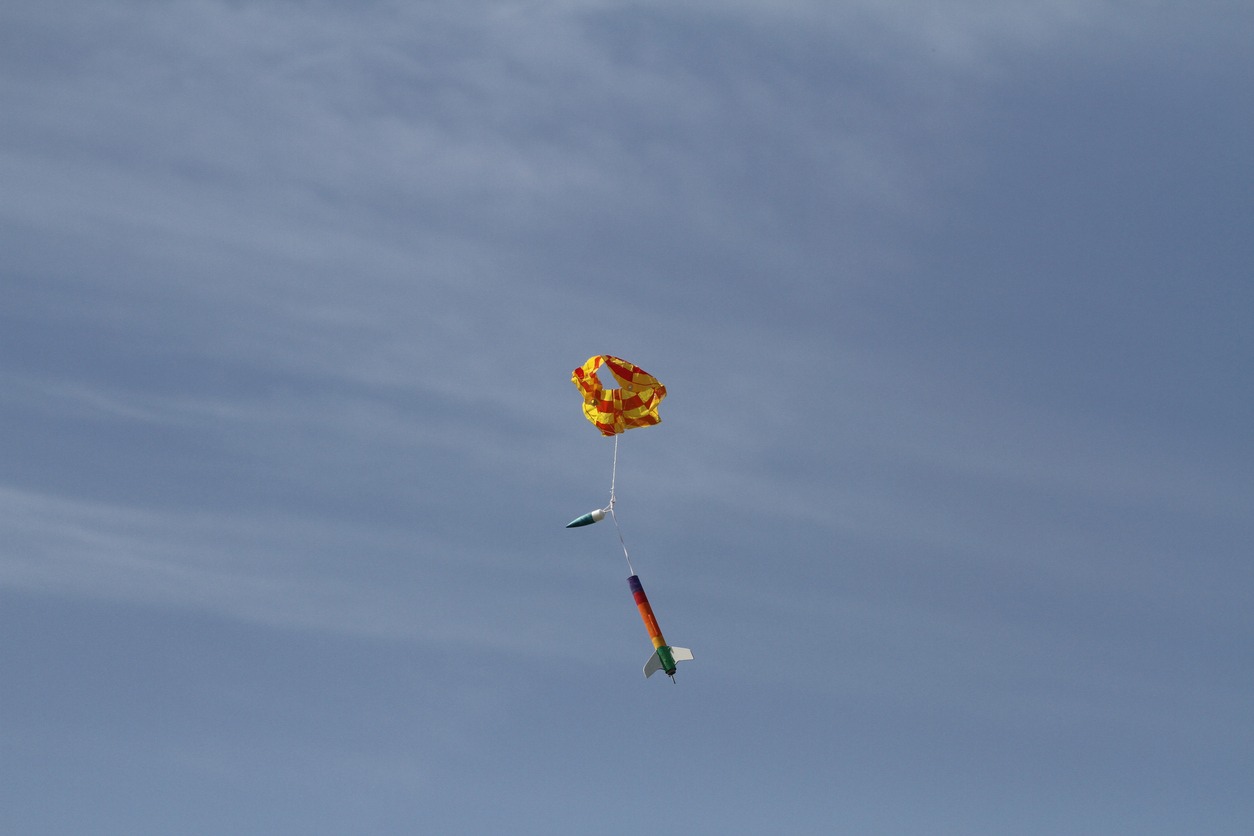
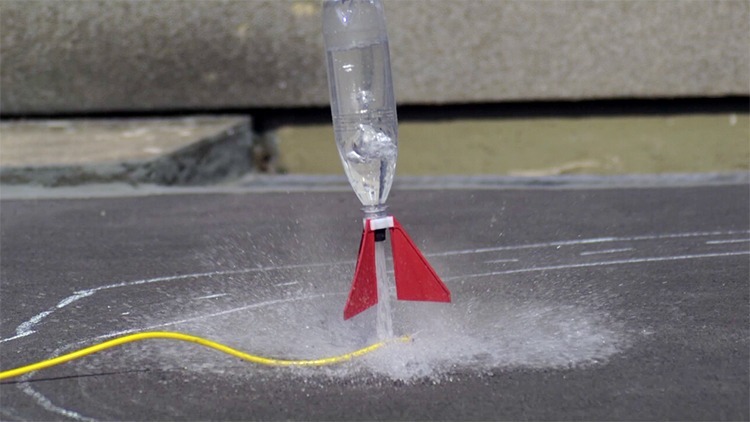
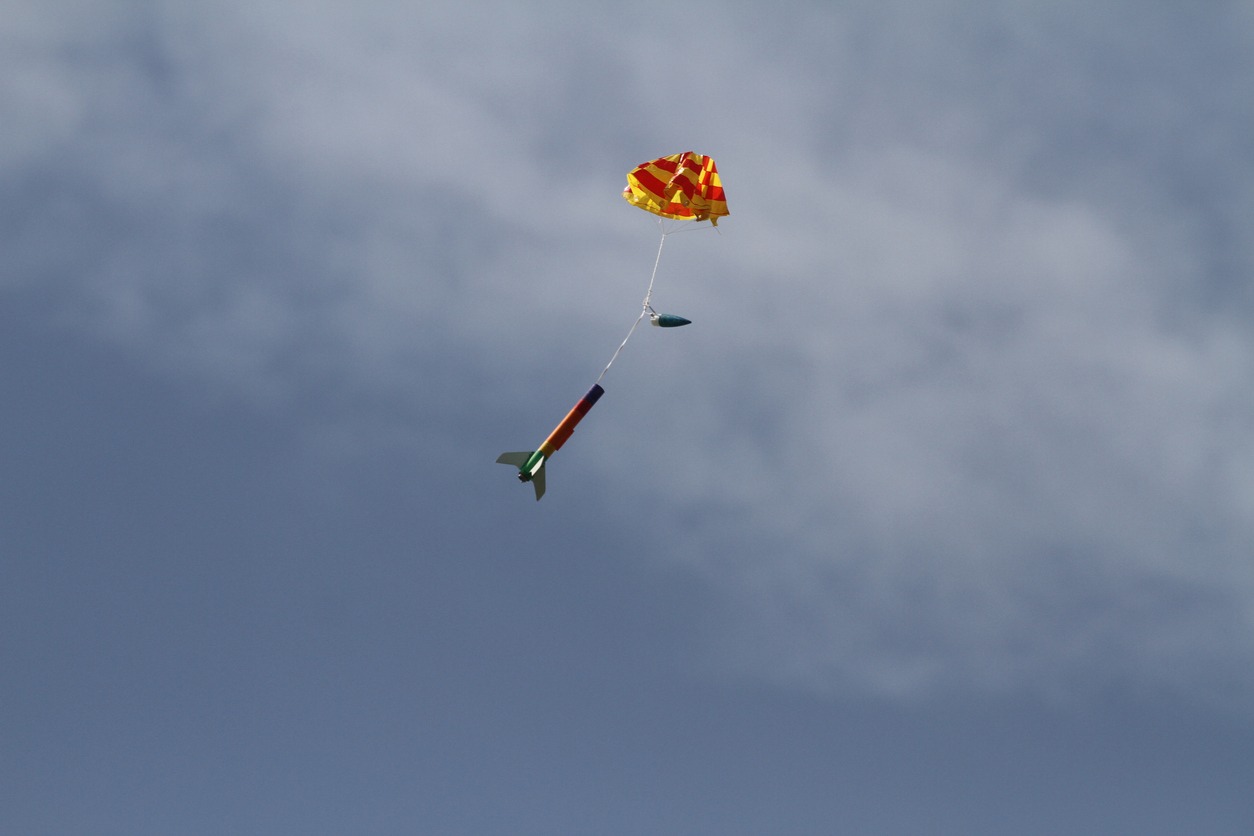
Water rockets are enjoyable toys to play with, as they can be launched high in the air. When playing with them, one of the biggest issues you may have is that they are difficult to recover because once they reach their maximum height, they land fast. Their speed is especially fast when they have stabilizing fins.
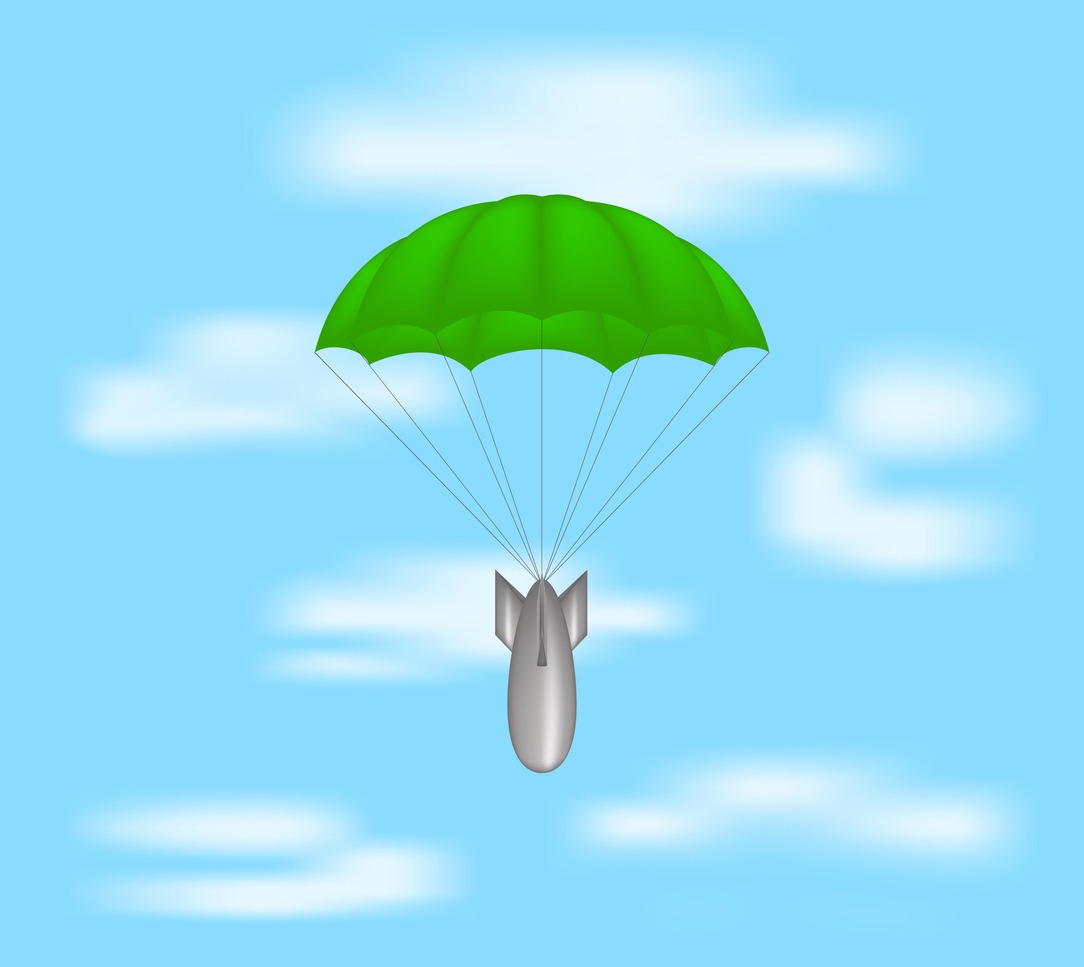
Besides being difficult to recover, water rockets can also be damaged if they fall from high up, as they will hit the ground much harder. These issues can easily be fixed if you attach a parachute to your water rocket. Doing so will slow down the descent, meaning you can tell where the water rocket will land. Additionally, it will not hit the ground so hard, so the rocket will not suffer any unnecessary damage.
Parachute Design
A parachute varies in shape and size and depends on the kind and size of rocket you are using. As a parachute can control the descent speed of the rocket, it is vital that it is constructed based on the rocket you are using. When constructing a parachute, you must consider the material it is made of. The parachute must use a strong, soft, thin, and flexible material.
If you intend on using a small rocket, then you can also use thin plastic sheets as they have the ability to be folded up tightly to fit into a small tube. On the other hand, if you plan to use plastic, you should take care when selecting a material. To do so, test it by tearing it in both directions. Doing so will tell you whether the material is strong enough. Often, plastics are made to be strong in one direction and not in the other.
Suppose your rockets have a descent mass of greater than 300 grams. In that case, it is best to use a cloth material like silk, nylon, polyester, and cotton. These materials are able to withstand larger opening forces, so they are perfect for bigger models. You can also create a heat-resistant parachute, provided that you use the right kind of plastic and cloth. Oven-roasting bags are a great plastic to use.
By making small changes in the parachute, you can also control the speed of descent. For example, if you want the rocket to descend faster and not drift too much in windy conditions, you can cut a spill hole at the top of the canopy. The larger the hole is, the faster the model will descend. Choosing a brightly colored material for your parachute will also help with visibility. You can find the rocket in the air and on the ground and track its descent more easily.
Things To Consider Beforehand
When adding a parachute to your rocket, there are many different factors that you should take into account so that it serves the purpose it was made for. As a rule of thumb, if you use a 2-liter plastic bottle, you should make a parachute around 10 to 20 inches in diameter. This parachute can be made using a garbage bag or any other lightweight material. You should also take care that the bottle is no heavier than 4 ounces.
Another factor that you should take into account is the rocket’s weight. The heavier your rocket is, the larger your parachute will need to be to slow down the descent. You should also consider how high it will fly. Suppose you plan to launch a powerful rocket that will likely fly high. In that case, your parachute should be strong enough to control its downward descent. The weather also plays a huge role. If the day is windy, you should ensure that the parachute is strong enough to withstand it and not get blown away with it.
How To Construct a Rocket Parachute
If you are making a rocket parachute from scratch, you will need some supplies and proper instructions to get started. Although parachutes seem relatively simple, you need to consider the weight of your rocket, the size, the weather conditions, and more. This means that each parachute will be unique
Designing the Rocket
The first step is to determine the size, shape, and weight of the rocket to ensure that the parachute will be able to slow it down safely during descent. Select a parachute that is the appropriate size and shape for your rocket. Consider factors such as the speed and weight of the rocket, as well as the altitude at which the parachute will deploy.
Collect All the Items You Will Need
When purchasing items to create your parachute, you will likely require a lightweight string, some tape, string, a rubber band, and a sheet of plastic or cloth. When choosing material for your parachute, you should consider the rocket that will be attached to it. You should also ensure that it is strong and can withstand strong wind. Additionally, it should be large enough. Although smaller rockets do not require parachutes with large diameters, you may want to make them larger to control the parachute's descent better.
The string you choose should also be sturdy in case the force of the rocket causes it to snap. However, it should not be too heavy as it may drag down the parachute. Other materials you should have include a ruler, marker, scissors, a craft hole punch, an X-acto knife, and tweezers.You will also need a device that deploys the parachute at the appropriate altitude, such as a drogue or a pilot chute.
Additionally, you will need appropriate safety equipment such as goggles, ear protection, and a hardhat when working with rocketry. You will need access to a launch site where you can safely test your rocket and parachute.
Prepare the Parachute Material
Once you have selected the material you will use for your parachute, lay it flat on the ground. If you plan on using a plastic garbage or roasting bag, you should cut off the bottom reinforcing part and the handles. By doing so, your next step will be a lot easier.
Trace and Cut the Parachute
Once your material is ready, use your ruler to flatten it, ensuring that all the wrinkles and creases are smoothened out. Then use either an old parachute or a new design and trace it onto the material. The next step is to mark all the corners so you can join them later. Use a ruler to make sure that the lines are straight. You can use a pencil or a sharpie to make these lines. Then you need to remove the stencil and use either an X-acto knife or scissors to cut the lines. If you plan on using an X-acto knife, use it with a ruler, as you can get nice, clean edges that will look professional.
Mark the holes and Cut Them Out.
The next step is to use a marker to place a dot on the corners of the parachute. This dot should be 1 cm from the corner. Then use a punch hole machine to cut through. If you are using a plastic bag, the punch hole machine may not cut through completely, so you can use heat to melt the plastic. You can also just pinch the tab and pull it, but the resultant cut may not be as neat.
Reinforce the Holes and Shroud Lines
For the holes to withstand the rocket's weight and the wind's speed, you should get some reinforcement tabs. These will be placed over all of the holes you have made. The next step is to cut your string into three 2-foot pieces. These are the shroud lines that you need to tie to your parachute. Ensure that the knot you choose is secure. Trim the string so that no pieces are hanging loose.
Test the Parachute
The last step is to test the parachute. Take the nose cone from the rocket or weight that has a small loop. Then put them through the loop on the nose cone and hold the parachute over the air, allowing it to inflate. Conduct test flights to ensure that the parachute deploys correctly and slows the rocket down safely. Make any necessary adjustments to the design before using the rocket parachute in a real flight. You can place the parachute on the rocket; if these steps go well, you can go and have fun.
How To Construct an Octagonal Parachute
An octagonal parachute is a popular kind of parachute that is used with water rockets. Here are the steps if you want to construct one.
Designing the Parachute
Determine the size and shape of the parachute and the number of gores needed to create the octagonal shape. You can use software or make calculations by hand.
Prepare the Parachute Material
Cut the fabric for the canopy and the suspension lines according to your design. You will need enough fabric to create the octagonal shape and to add extra material for gathering and hems.
Sewing the Canopy
Sew the gores together to form the octagonal shape of the canopy. Use a strong and durable thread and make sure the seams are straight and secure.
Attaching the Suspension Lines
Sew the suspension lines to the canopy at the appropriate points. The suspension lines should be evenly spaced around the canopy and should be attached to the strongest part of the canopy.
Packaging the Parachute
Fold the parachute and pack it into a container such as a duffle bag or a backpack. Make sure that the parachute is packed correctly to ensure that it will deploy correctly.
Testing the Parachute
Conduct test drops to ensure that the parachute deploys correctly and that it provides enough drag to slow the descent. Make any necessary adjustments to the design before using the parachute in a real drop.
Recommended Parachute Sizes

When making parachutes, the weight of your rocket is extremely important. Here are some standard rocket weights and the size of parachutes that go along with them.
Weight of the Rocket | Size of the Parachute (diameter) |
0 to 2 oz | 12 inches |
3 to 8 oz | 18 inches |
9 to 15 oz | 24 inches |
16 to 23 oz | 30 inches |
24 to 35 oz | 36 inches |
36 to 47 oz | 42 inches |
48 to 64 oz | 48 inches |
Useful Instruments
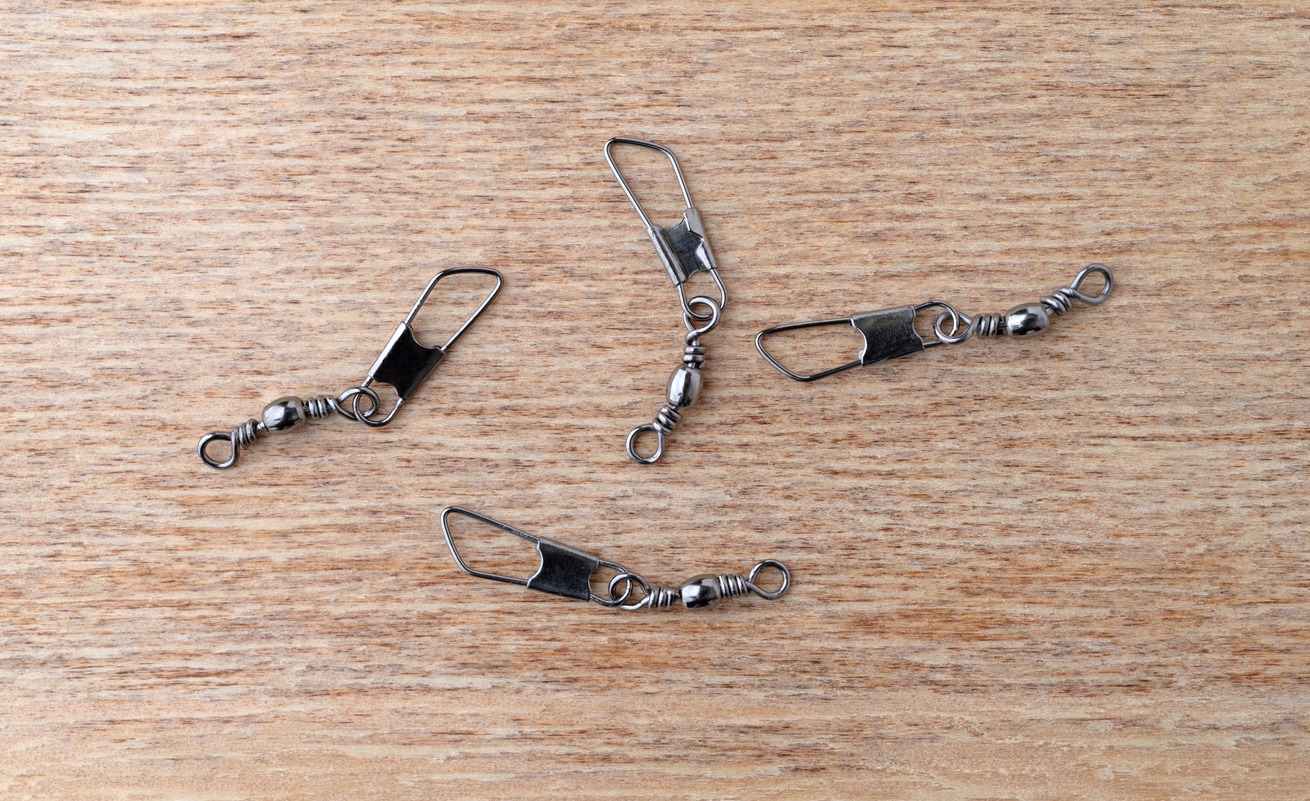
When making parachutes for your water rocket, there are some essential instruments that you must have. This helps make your job easier and your parachute much more robust. Two commonly used tools include snap swivels and screw eyes.
Snap Swivels
Snap swivels allow you to connect the parachute to the shroud line and chute. It can be extremely helpful in preventing shock cords and tangles in shroud lines. They also make it much easier to switch out streamers and chutes. They range from size 1 to 12, where size 1 is the largest and 12 is the smallest. Professionals advise against using the size 12 snap swivels as they are often too small. The best size is size 7.
Screw Eyes
Screw eyes are threaded screws with a loop at one end. They can be manually driven through a material by applying pressure. These are used to attach a shock cord to a parachute and can be incredibly helpful in ensuring that the two parts do not come apart.
FAQs
1. What is a good parachute material for a bottle rocket?
If you want to attach a parachute to your bottle rocket, you can make it from a plastic garbage bag. They are lightweight yet durable and can easily hold the weight of a 2-liter plastic bottle rocket weighing 4 pounds.
2. How to make a parachute fall faster?
To make your parachute fall faster, you need to make it using a heavier material as they tend to descend faster.
3. Does a bigger parachute fall slower?
Yes. The larger your parachute, the slower it will fall. Due to the size of the parachute, it will have more surface area and, thus, more resistance. This will make it fall much slower.
Conclusion
Water rockets are extremely fun handheld catapult-like toys to play with. Still, they have a tendency to get lost or destroyed because they fall with incredible speed and often get swept away by the wind. To prevent this from happening, you must have a parachute using which you can keep track of the water rocket as it falls and slow down its descent.
There are multiple types of parachutes that you can make if your water rocket kit does not come with one. Still, you must consider certain factors, such as the size of the rocket, the material of your parachute, how fast you want the rocket to fall, and more. By keeping these in mind, you will be able to create a parachute that fits your needs and allows you to keep your parachute safe.