For those who are new to airbrushing, it is a type of art that makes use of compressors and airbrushes. Airbrushes spray several types of media, such as dyes, inks, and paints, onto the user’s preferred surface or canvas. Airbrushes are popular among artists, hobbyists, and creative people. And with good reason. The power tool allows them to create a flawless masterpiece, whether it is a design on a wall, an automobile, or a piece of wood furniture. However, these individuals must have the proper machine for powering their airbrush; this need has been the driving force behind the growth and popularity of airbrush compressors.
Though most project managers consider air compressors to be a source of power for various instruments, they are also excellent companions to airbrushes. Because users will need a constant flow of pressured air to operate the brush, an airbrush compressor is more of a must than an alternative. While gas compressors can be used for the same reason, you may find yourself rushing for a replacement once it runs out. Airbrush compressors, on the other hand, provide a more consistent source of air pressure and output. For more information on air compressors, check out our Guide to Using the Right Air Compressor.
What is an Airbrush?
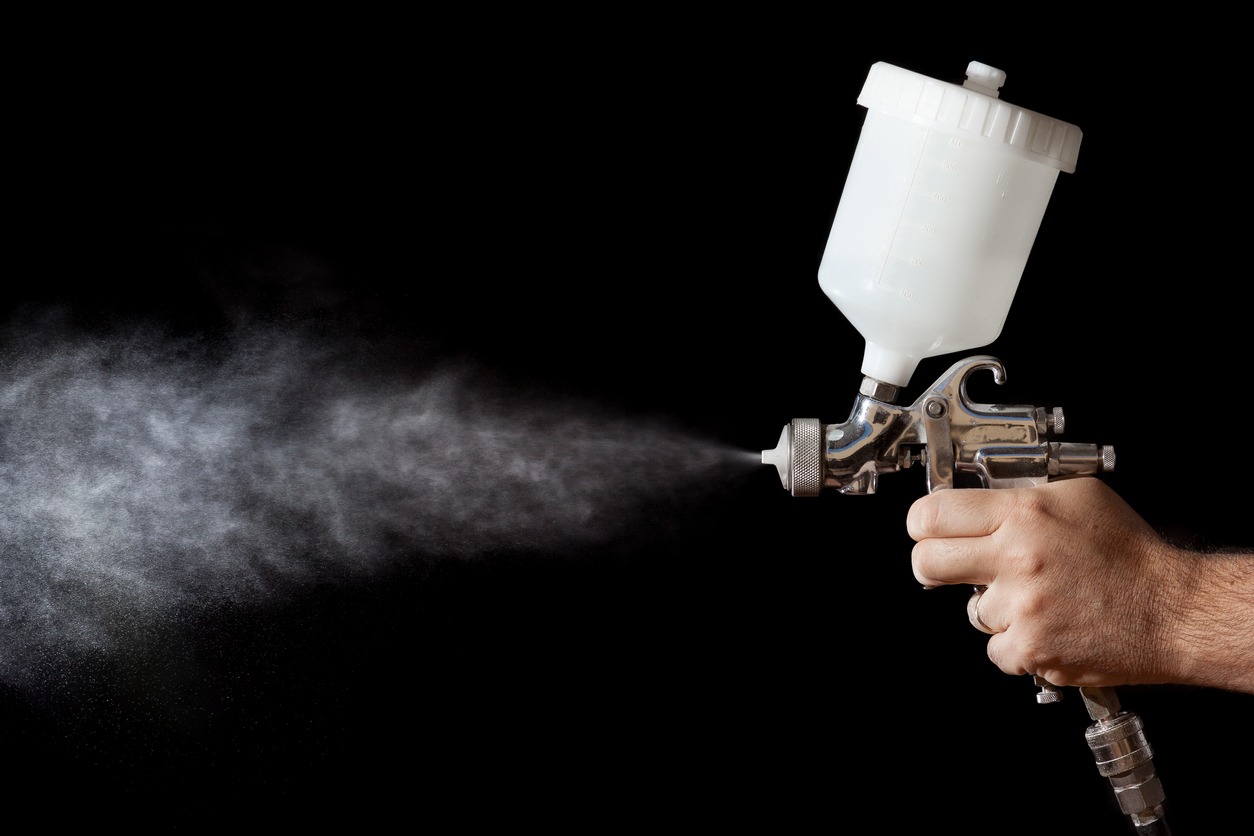
Airbrush is a term that describes both the painting technique and the tools employed. The primary tool, the airbrush gun, thereby alludes to a complete art genre. The working idea is rather straightforward: compressed air is produced by a compressor and directed into a spray gun, where it passes through liquid paint. The paint drops are then carried by air as a result. Through a nozzle, the paint is atomized in the air stream and applied to the painting surface. The surface being painted is never in contact with the painting instrument. Only the fine spray mist is used for painting. A fine film of paint is produced using the airbrush technique without the use of brush strokes or stripes.
History of Airbrush
In certain forms, airbrush art has been around since the Stone Age. It is believed that a primitive airbrush was used to make cave murals. The walls were supposedly painted with mouth sprays of juice or colored liquids. Francis Edgar Stanley created the first actual airbrush pistol at the end of the 19th century. It was mostly utilized for painting tasks on models and in the automotive industry. The airbrush method has been used in practically all artistic disciplines since the 1960s.
Types of Airbrush
All airbrushes employ one of two air/fluid control mechanisms: single-action or double-action. The best option depends on your particular preferences or how well the airbrush is applied. The single-action airbrush is all that is required for artists who only need to cover a surface. A double-action airbrush is frequently used by those who seek more controlled and intricate work.
- Single-Action: The single-action airbrush employs the same fundamental spraying technique as cans of spray paint. The amount of paint that sprays out is controlled by a knob that is often placed close to the airbrush’s tip when the artist depresses the trigger to cause the paint to flow through the airbrush. This kind is occasionally referred to as an external mix airbrush since the air and paint combine in front of the needle. Because they are so simple to operate and maintain, single-action airbrushes are a fantastic option for novices. They are simpler to control than the double-action control system. This type’s drawback is that it is less accurate than a double-action airbrush. The single-action model is best if you don’t need an airbrush for extreme precision for greater overall coverage.
- Double-Action: Though slightly more complicated than a single-action airbrush, a double-action airbrush offers more control. To control the airflow and begin the flow of paint, the artist pulls back on the trigger. The spray pattern is made wider by pulling back on the trigger since more paint is sprayed. This kind is known as an internally mixed airbrush because the paint and air are blended in the space behind the needle. The double-action airbrush’s ability to shape and create very thin lines is one of its benefits. The enhanced precision control makes this type popular among freehand and t-shirt artists. Because you have complete control over the paint flow, double-action models are more expensive than single-action varieties and more challenging to use.
Feed Styles
This describes the process of “feeding” paint or other spray substance into the airbrush. Three different airbrush feed styles are available.
- Gravity Feed: A color cup installed on top of the airbrush serves as the source from which paint is drawn into an airbrush in a gravity feed system. The reason gravity feed is so named is that it allows spray material to pass through the airbrush more easily. Lower air pressures are now possible for the airbrush to spray at. This feed type is more cost-effective to employ and uses every drop of paint, requiring less paint overall. For the majority of applications, gravity feed is the most sensible option. Most gravity cups have a tight-fitting lid that stops paint from spilling.
- Siphon Feed: Paint is brought up from a jar or color cup from beneath the airbrush in siphon feed systems. In contrast to gravity feed, siphon-feed airbrushes require the air compressor to perform all of the work. To spray material, additional air pressure is necessary. When employing more spray media, siphon feed is better. This style is also known as bottom feed or bottle feed.
- Side Feed: Through the side of the airbrush, side feed systems draw spray material from a color cup or bottle. There are several different sizes of side feed cups and bottles that may be attached to either the left or right side of the airbrush. When painting details, some users believe the side feed style gives them better visibility of their work.
Using an Airbrush
- Mixing: Make your paint mixture first. There are pre-mixed airbrush paints available, but you can also use any acrylic paint by thinning it with a little water until it has the consistency of ink. If the paint is still too thick, you may always add additional water, but you cannot take it back out. Be patient if it takes a few tries to get this method down; it may take some practice. Make sure you choose the proper paint for your art because the type of project you’re working on will dictate what kind of paint is used.
- Testing: It’s time to test your paint once it has been blended. Adjust the needle cap on your airbrush so that the needle does not touch it and there is enough room for the air to escape. Spray some of your paint to check the consistency on a scrap of paper. Practice utilizing your airbrush’s level and button during this time as well. Try to keep the tip of the airbrush about eight inches from the surface; this will give you the smoothest effect and the most control.
- Atomization Management: Practice regulating the atomization of the airbrush once you’re happy with the paint’s consistency. The atomization process determines the paint spray’s particle size, and the higher the pressure, the finer the paint spray. Don’t be scared to play with various colors and viscosities of your paint until you achieve the desired effect because the sort of paint you have will also affect the atomization. You can spray with accuracy using low-viscosity paint and a fine airbrush needle.
- Sketching: Lay out your stencil on your work surface or lightly sketch the outline of your project. You have the option of using already-cut airbrush stencils or making your own with a knife and plastic stencil boards. To prevent your final paint from showing through your sketched lines, strive to make your lines as light as you can. Make sure your outline or stencil is precisely where you want it to be by taking a step back and looking at it.
- Layering: Remember that you can only have one color in your airbrush at a time as you start painting. Start by filling in the broad regions, then work your way up. Keep in mind that you will be applying paint in layers to get the desired effects when using very dark hues. Mask off any places you don’t want to paint as you proceed, especially if it will be a straight line. For sharp edges, you can use tape and paper cutouts, or you can use a plastic sheet with an adhesive backing that has been cut to the right size and form. Finish using a finer needle and lower air pressure as you get to more intricate work.
- Sealing: Apply a fixative to the painting once you’re done seal it. This will protect it if it rains, which is particularly important for some work surfaces. Most craft and hobby stores sell fixative sprays; check the bottles to determine what surfaces they are safe for.
Airbrushing can be a fun creative tool to be utilized for all types of projects including woodworking, artistic painting and more. Be sure to carefully consider the different types and options for picking the right airbrush for your next project. In addition there are a wealth of videos, how-to guides and more to help you get started with airbrushing.

